来龙去脉
最近重装了电脑,近几年内每次重装也好,装备新电脑也好,越来越觉得这个博客是令我比较头疼的事
因为前几年从 WordPress 迁移到了 Hexo,虽然变成了纯静态,访问速度上提高了。但本地文件的维护、文章的发布就变得很繁琐
比如
- 重装必须备份
- 多台电脑必须同步最新的
- 发布文章需要在本地跑三条命令
多台电脑同步的问题,我在家里树莓派上建了个 git 仓库,专门同步文章。不过大部分时间都会忘记,并且配置文件、主题的配置文件都不在文章目录,所以没法同步
觉醒
最近一次重装我依然是手动备份,重装后看着这个备份,觉得这样下去不行,得赶紧拿出个更完美(懒)的方案
想起之前在一个浏览器插件的仓库看到了自动发布脚本,我有个浏览器插件每次发布都很繁琐,因此早就想研究一下自动化
所以这次第一个念头也是自动化:Github Actions
旧流程
按照之前手动挡的流程是这样的
- 清除缓存
hexo clean - 生成静态文件
hexo g - 部署
hexo d(执行一次 git 推送) - 远程仓库
hooks 被触发,自动去网站根目录,git pull
最后网站根目录拉取到文章,部署成功
其中 3 之前你需要在本地手动执行的,而且重装或者换电脑意味着需要在远程服务器配置新的公钥
新流程
新的半自动挡解决了 1-3,你只需要进行一次 git 提交
其他的事情交给 Github Actions

整个流程是
- 创建密钥,用于连接博客服务器
- 安装
hexo - 安装
hexo 插件 - 拉取主题
- 安装主题依赖包
- 检查主题目录
- 配置
git - 生成静态文件
- 部署!
工作流配置
1
2
3
4
5
6
7
8
9
10
11
12
13
14
15
16
17
18
19
20
21
22
23
24
25
26
27
28
29
30
31
32
33
34
35
36
37
38
39
40
41
42
43
44
45
46
47
48
49
50
51
52
53
54
55
56
57
58
59
60
61
62
63
64
65
66
67
68
69
| name: publish
on:
push:
branches:
- master
jobs:
publish-blog:
runs-on: ubuntu-latest
steps:
- uses: actions/checkout@v2
- uses: actions/setup-node@v1
with:
node-version: 14
registry-url: https://registry.npmjs.org/
- name: create keys
run: |
mkdir -p ~/.ssh
echo '${{secrets.PRIVATE_KEY}}' > ~/.ssh/id_rsa
chmod 600 ~/.ssh/id_rsa
ssh-keyscan -t rsa 1.2.3.4 >> ~/.ssh/known_hosts
ls -l -a ~/.ssh
- name: install hexo-cli
if: steps.cache.outputs.cache-hit != 'true'
run: npm i -g hexo-cli
- name: install hexo dependencies
run: npm i
working-directory: hexo
- name: pull themes
run: |
mkdir -p hexo/themes
git clone -b master https://github.com/jerryc127/hexo-theme-butterfly.git hexo/themes/butterfly
echo 'themes config'
cp hexo/themes_butterfly_config.yml hexo/themes/butterfly/_config.yml
echo 'background image'
cp hexo/images/bg.png hexo/themes/butterfly/source/img/bg.png
- name: install themes package
run: npm i
working-directory: hexo/themes/butterfly
- name: check themes package
run: ls -l
working-directory: hexo/themes/butterfly
- name: git config
run: |
git config --global user.name imba97
git config --global user.email mail@imba97.cn
git config --global init.defaultBranch master
working-directory: hexo
- name: hexo generate
run: |
hexo clean
hexo g
working-directory: hexo
- name: deploy!
run: |
git init
git add .
git commit -m "deploy!"
git remote add origin root@1.2.3.4:/git/blog.git
git push --force origin master
working-directory: hexo/public
|
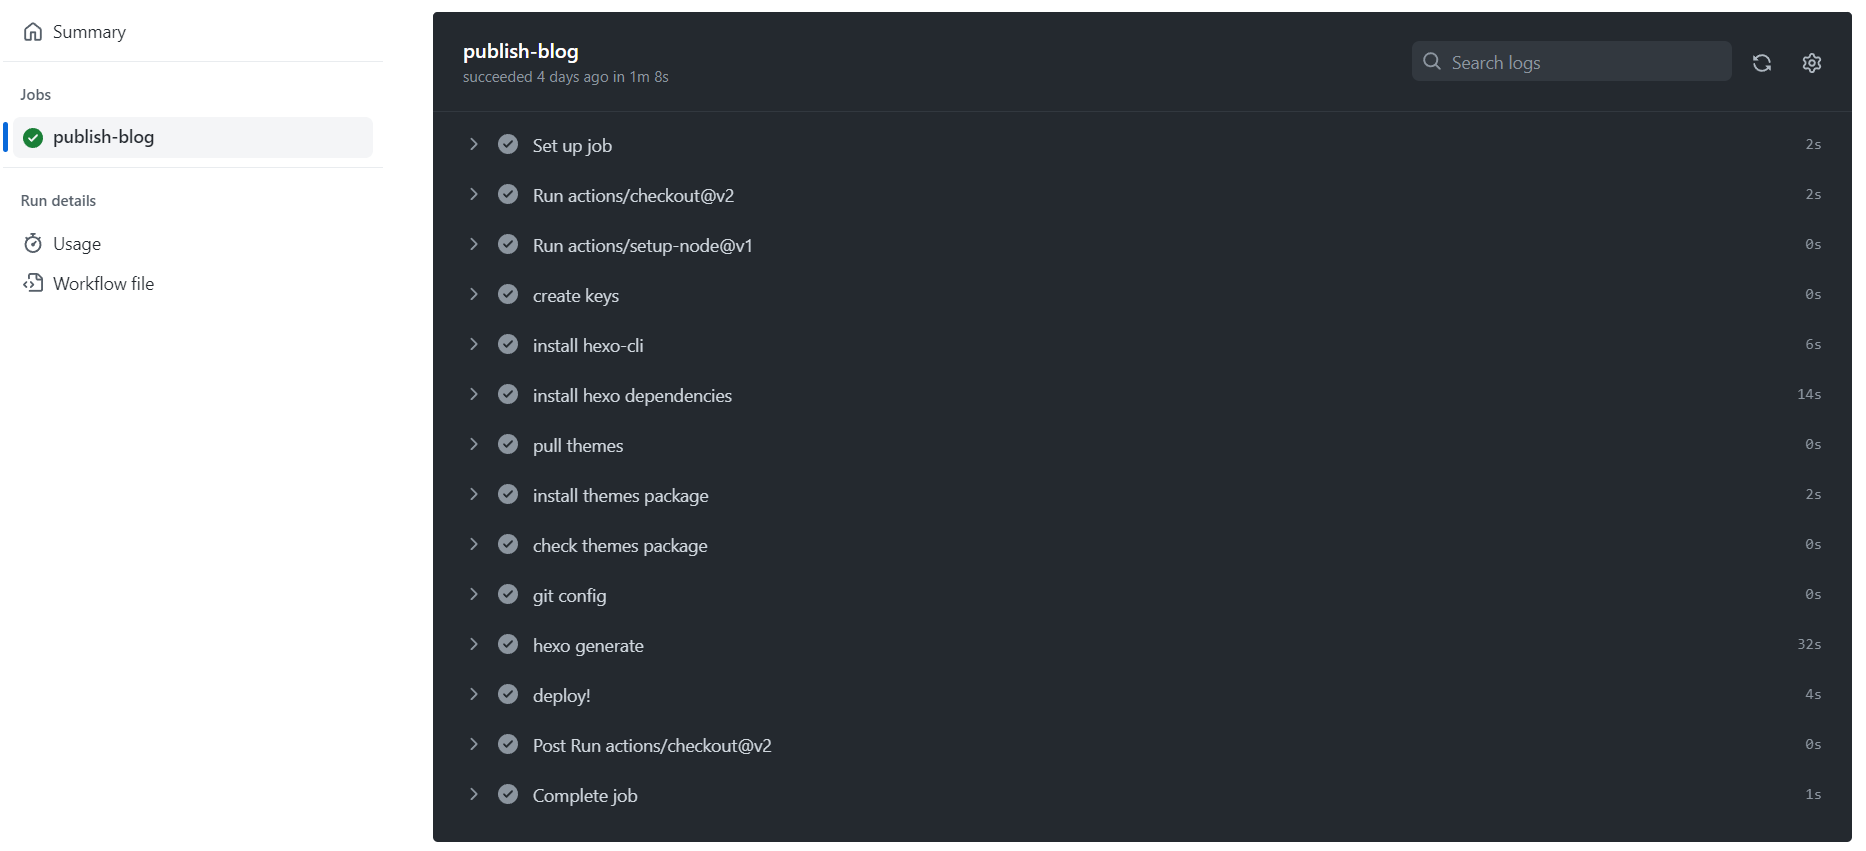
经过了大概 40 次左右的测试,最后终于是成功部署
主要问题
期间主要解决 git push 不成功,私钥问题
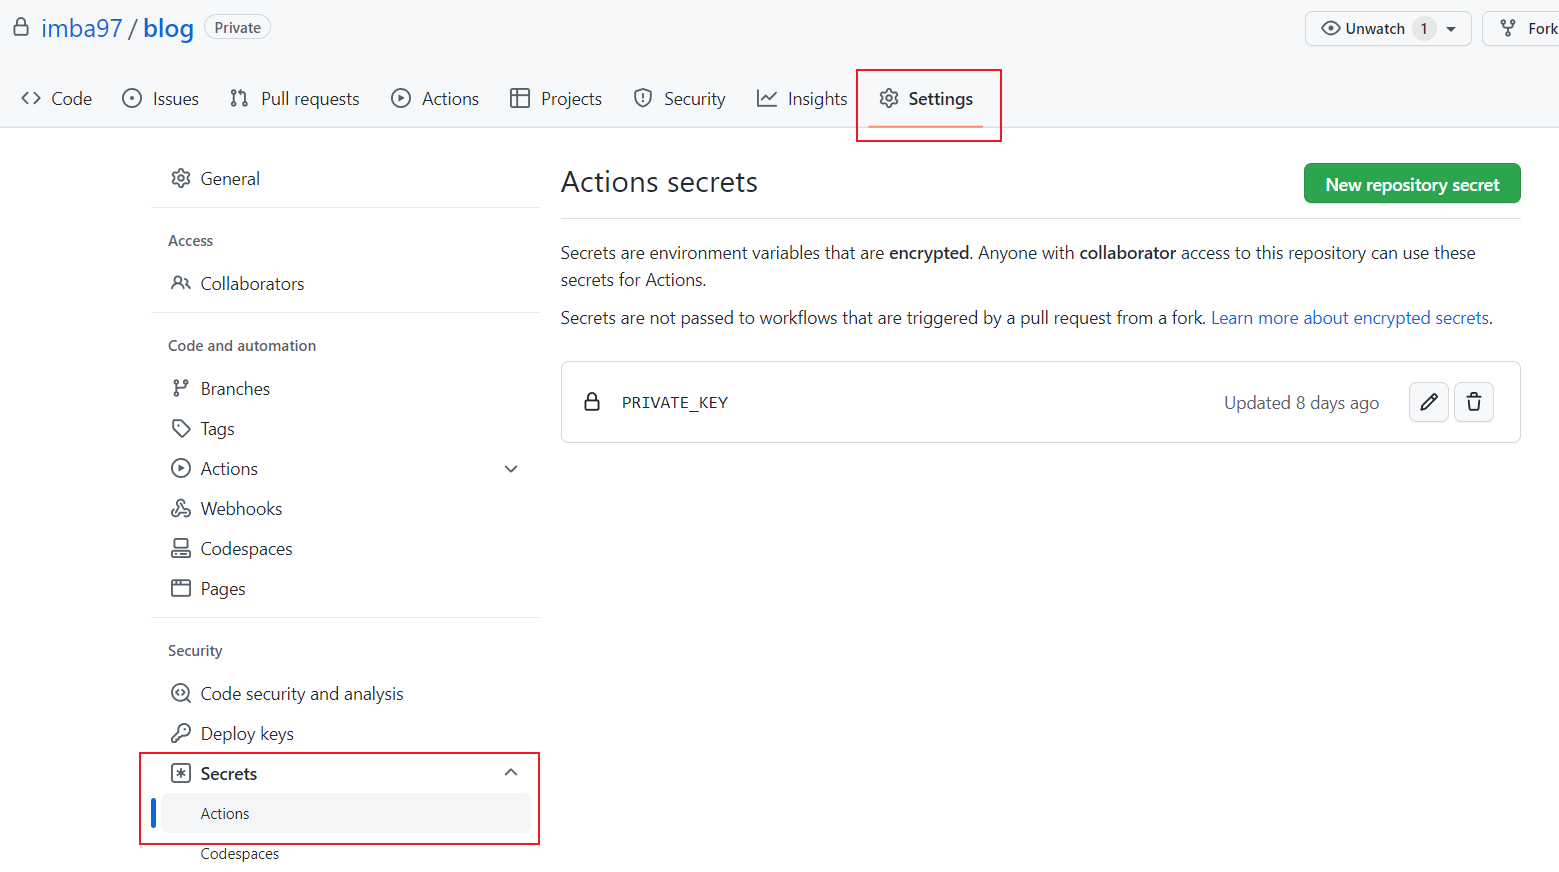
问题的关键是,你不但需要在 ~/.ssh/ 下创建私钥,还需要创建一个 known_hosts,记录已知的服务器 IP
私钥创建流程,我是在我本地创建了一对密钥,把私钥复制出来放到仓库配置中
工作流使用的时候就把它写入到文件
1
| echo '${{secrets.PRIVATE_KEY}}' > ~/.ssh/id_rsa
|
记录已知的服务器 IP 也就是工作流的这一步
1
| ssh-keyscan -t rsa 1.2.3.4 >> ~/.ssh/known_hosts
|
其他小问题
主要是主题,主题自定义的配置文件和图片,解决方案是直接放在仓库,复制过去
所以如果你打算用以上工作流,还得根据自己的主题去改改
收工
至此,我本地将不在管理博客的任何东西,甚至写博客都可以随时打开 Github 来写,比如现在
而且依然也可以在本地写,如果换主题肯定还是要本地跑一下测一下的
总之,爽到了
其他补充
为啥说是半自动挡呢,因为我感觉服务器部分也需要继续优化,不能通过 git hooks 的方式部署,这样的话迁移到另一台服务器还得配置一遍,也是很麻烦的
之后考虑在工作流中用 sftp 直接上传的方式部署,需要解决的问题是生成静态文件数量非常多,目前考虑可以先压缩,再上传,再给博客服务器发送解压命令
等不懒了搞一搞,再水一篇文章 ( ´_ゝ`)